
How to add your Ultrasound Concierge booking straight to your phone calendar
Instead of searching your messages for the booking every time, add your confirmed ultrasound appointment to your phone calendar and attach a reminder. For your The Ultrasound Concierge visit, copy the confirmed date, time, and location into Apple Calendar or Google Calendar, then check the saved event against the original booking.
TL;DR
To add ultrasound appointment to phone calendar, copy the confirmed booking into Apple Calendar or Google Calendar.
The Ultrasound Concierge serves patients seeking private diagnostic and elective ultrasound visits in Keller and Willow Park.
Save the confirmed location, choose a private calendar, and add an appointment reminder.
After rescheduling, update the calendar event yourself unless a linked invitation confirms the change.
Why this matters
Your calendar should answer three questions without another search: when is the visit, where are you going, and what do you need to check beforehand? An event with only a title leaves the practical details in your inbox.
The Ultrasound Concierge is best for Keller and Willow Park patients seeking private diagnostic or elective ultrasound imaging. The calendar workflow below helps you organize that visit; it does not book, change, or cancel an appointment.
For a 2026 booking, use the latest confirmation as your source of truth. A calendar entry is a copy of the appointment information, not proof that the appointment is confirmed.
Before you start
Have the latest confirmation open. You need the appointment date, start time, confirmed location, and any preparation instructions supplied for your visit. Resolve conflicting details with the provider before saving them.
Choose your calendar account. Open Apple Calendar or Google Calendar and identify the personal calendar where you want the appointment stored. Avoid a shared work or family calendar if its members should not see the visit.
Check the update trap. A manually created event does not receive changes from the booking provider. If the appointment moves, you must edit that event; importing a calendar file also does not guarantee ongoing updates.
Keep the original confirmation accessible after creating the event. Preparation requirements depend on the scan, so do not replace supplied instructions with general advice from another appointment.
Choose your calendar workflow
Use the calendar you already check, not a new app just for this appointment. Apple Calendar and Google Calendar both support appointment events and reminders. Neither needs a special ultrasound integration for the manual workflow.
The labels below describe the English-language mobile interfaces used for this 2026 guide. Account settings and app versions affect which additional controls appear; follow the instructions for the app you actually open.
Apple Calendar
Best for: iPhone users who already organize appointments in Apple Calendar
Main advantage: Keeps the visit alongside existing events and supports alerts
Main limitation: A manually entered booking needs manual edits after rescheduling
Google Calendar
Best for: Android users and people already using a Google calendar across devices
Main advantage: Stores the visit in the selected Google account and supports notifications
Main limitation: Choosing the wrong account can hide the event from the calendar you normally check
Google Calendar also works on iPhone. Choose based on your existing calendar habits, not the phone brand alone.
If your confirmation supplies a calendar invitation or an add-to-calendar control, review its date, time, location, and destination calendar before accepting it. Otherwise, use the manual steps below. Do not assume a calendar attachment or automatic synchronization is part of the booking.
Confirmed booking details
Check the date. Read the full appointment date, including the year. When entering a 2026 appointment, verify that the calendar has not opened a different year.
Check the time. Copy the confirmed start time and verify AM or PM. Keep any separate arrival instruction distinct from the appointment start.
Check the location. Copy the confirmed address rather than guessing from the provider name. Keller and Willow Park are different destinations.
Check the preparation. Keep provider-supplied preparation instructions available. Add only the details you are comfortable storing in your calendar.
Choose the calendar. Select a personal account whose sharing settings match your privacy needs.
Expected result: you have one confirmed date, start time, destination, and calendar account ready to enter. If any detail remains unclear, clarify it before continuing.
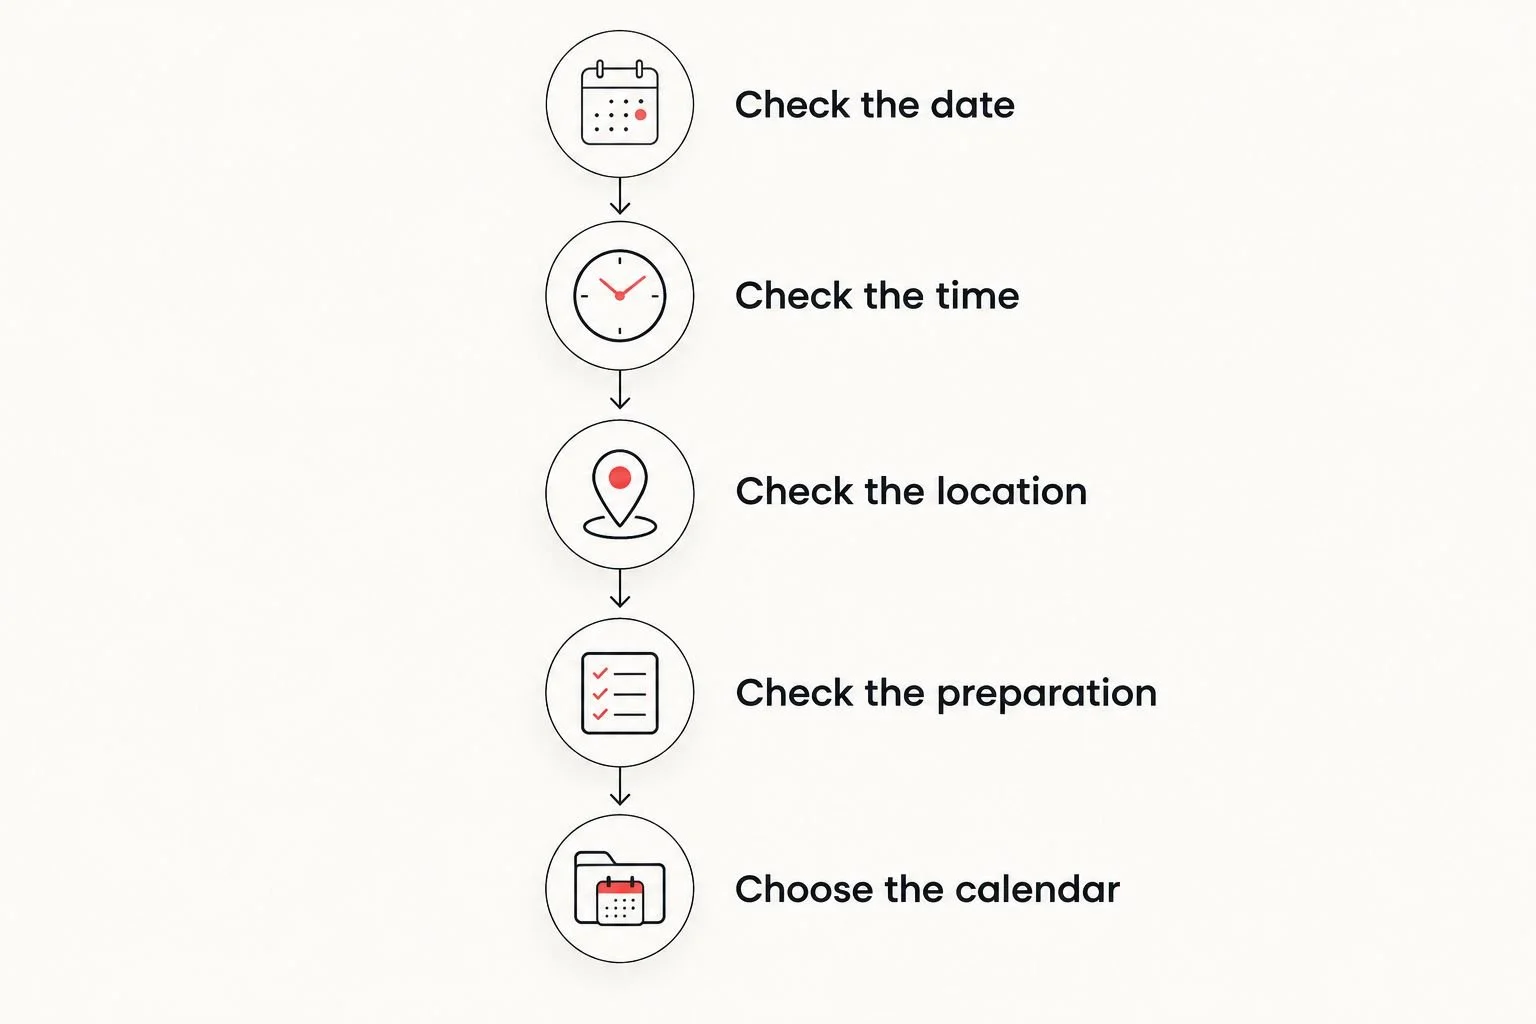
Confirm the booking details before copying them into your calendar.
Avoid guessing an end time when the confirmation does not state one. The app needs an event length, but its default duration is not a clinical estimate; ask the provider about timing if you need to plan another commitment immediately afterward.
Apple Calendar setup on iPhone
Open Calendar and tap + to create an event.
In Title, enter a name you will recognize. A neutral title such as Appointment limits the detail displayed in calendar views.
In Location, enter the confirmed visit address. Check the address if the app offers a suggested location.
Set Starts to the confirmed appointment date and time. Leave All-day off for a timed visit.
Set Ends using the confirmed end time, if supplied. Otherwise, treat the duration as your planning placeholder, not a promised scan length.
Tap Calendar and select the intended personal calendar.
Open Alert and choose a reminder interval that suits your travel and preparation needs. Use Second Alert if you want another reminder and that control appears.
Use Notes for a short logistical reminder, without adding sensitive medical details unnecessarily.
Tap Add, then open the saved event and compare it with the confirmation.
Expected result: the appointment appears on the correct day in Apple Calendar, with the confirmed start time, address, and chosen alert.
For a 2026 appointment, inspect the saved date rather than relying on the calendar's currently displayed month. Also check that the event belongs to the account you intended, especially if personal and work calendars appear together.
Google Calendar setup on your phone
Open Google Calendar and tap Create, then Event.
Tap Add title and enter a recognizable appointment name. Keep the wording neutral if notification previews or calendar sharing concern you.
Set the start date and start time from your booking confirmation. Leave All-day off.
Set the end time from the confirmation when supplied. Do not interpret the app's default event length as the appointment duration.
Tap Add location and enter the confirmed address. Review any location suggestion before selecting it.
Check the calendar account shown in the event editor and select the intended calendar.
Tap Add notification and choose a reminder interval. Add another notification if you need a separate preparation prompt.
Use Add description for brief logistical notes. Avoid adding guests unless you intentionally want to send an invitation.
Tap Save, reopen the event, and compare the saved details with the confirmation.
Expected result: the appointment appears in your chosen Google calendar with the correct date, time, address, and notification settings.
If Google Calendar shows several accounts, check the event's account before leaving the editor. An event saved under your work account will not become a personal-calendar event simply because you created it on your own phone.
Reminder and privacy checks
Separate preparation reminders from departure reminders. A prompt to reread instructions is useful earlier than a prompt to leave home. Neither should change the appointment's confirmed start time.
For example, you can choose a 24-hour reminder to review the confirmation and a 1-hour reminder to check your travel plan. These are optional planning intervals, not preparation requirements or a travel-time estimate. Choose different intervals when your instructions or journey require them.
Before relying on the reminder:
Confirm that phone notifications are enabled for your calendar app.
Review Focus or Do Not Disturb settings that affect notifications.
Check which calendars are shared and who can view their events.
Review notification previews if you do not want appointment details on the lock screen.
Expected result: the event is saved where you expect, and your phone permits the calendar app to notify you.
For a practical 2026 check, create a separate test event starting 10 minutes from now, with a notification at its start time. Check whether the notification arrives, then delete the test event. This tests your current notification setup without altering the real appointment.
When your ultrasound appointment changes
A rescheduled appointment needs a calendar update, not just a new message in your inbox. Edit the existing event instead of creating a second one. That keeps the old appointment from remaining as an active reminder.
Open the latest rescheduling confirmation and identify the new date, time, and location.
Find the original appointment event. In Apple Calendar, tap Edit; in Google Calendar, tap the pencil-shaped edit control.
Replace the old start date and time, then review the end time separately.
Update the location and logistical notes if those details changed.
Check the reminders again. A new appointment time can change when you need a preparation or departure prompt.
Save the changes and search your calendar for another copy of the old appointment.
Expected result: one event matches the latest confirmed booking, and no obsolete appointment remains to trigger a misleading reminder.
If a provider-sent invitation updates automatically, verify the updated event before making another copy. If the visit is canceled, remove the calendar event only after the cancellation is confirmed; deleting an event from your phone does not cancel the booking.
When rebooking across a year boundary, check both the month and year. A move from a 2026 date into another calendar year requires more than changing the day number.
Troubleshooting
The event is saved, but you cannot see it
Check which calendars are displayed. In Apple Calendar, open Calendars and select the calendar containing the event; in Google Calendar, open the navigation menu and check the relevant calendar. Confirm that you are viewing the same account used when saving it.
The appointment appears at the wrong time
Compare the event with the confirmation, including AM or PM and the time zone. Keller and Willow Park use Central Time. If you are traveling, distinguish the phone's displayed local time from the appointment's local time before editing the event.
The appointment reminder does not appear
Reopen the event and confirm that an alert or notification is attached. Then check the calendar app's notification permission and your phone's Focus or Do Not Disturb settings. Repeat the test-event check rather than assuming the next reminder will work.
There are two copies of the appointment
Compare both entries with the latest confirmation and identify which one you intend to keep. Delete the unwanted manual copy. If one entry is a provider invitation, avoid declining it accidentally while removing your own duplicate.
The old date remains after rescheduling
Update the manually created event from the latest confirmation. Do not expect a booking message to edit your calendar automatically. Search for the old date afterward to catch a duplicate saved in another calendar.
Customize your workflow
Keep the appointment event focused on logistics: confirmed time, destination, reminders, and where to find preparation instructions. Medical reports, scan findings, and detailed health history do not need to be copied into a calendar note.
For an ultrasound visit with The Ultrasound Concierge, keep clinical preparation separate from general calendar organization. A reminder helps you find the instructions; it does not determine which instructions apply to your scan.
If someone is accompanying you, share only the information they need. Sending a time and location separately avoids exposing the rest of your calendar, and it does not imply permission to attend the appointment.
FAQ
How do I add my ultrasound appointment to my phone calendar?
Create an event in Apple Calendar or Google Calendar using the confirmed appointment date, time, and location. Choose your personal calendar, add a reminder, and compare the saved event with the original confirmation.
Does adding a calendar event confirm my ultrasound booking?
No. A calendar event organizes your appointment information; the booking confirmation establishes the appointment. Creating, editing, or deleting a personal event does not change the provider's schedule.
Can I use Google Calendar for an ultrasound appointment on an iPhone?
Yes. Google Calendar works on iPhone, so you can use it if that is where you already manage appointments. Check the account and notification permissions before relying on the reminder.
Will my calendar update when I reschedule my ultrasound?
A manually created calendar event will not update from a rescheduling message. Edit it using the latest confirmation, unless a linked provider invitation has already updated and you have verified the new details.
What should I put in the location field?
Enter the address confirmed for your specific appointment. For a The Ultrasound Concierge visit, check whether your confirmation specifies Keller or Willow Park rather than choosing a location from memory.
How early should I set my ultrasound appointment reminder?
Set reminders around your preparation instructions and actual travel needs. An earlier preparation reminder and a separate departure reminder serve different purposes; neither replaces instructions from the provider.
Can other people see my ultrasound calendar event?
Other people can see event information if your calendar sharing settings give them access, and notification previews can expose details on your screen. Choose an appropriate calendar, use a neutral title, and review sharing and preview settings.
One last thing
Saving the event and receiving the reminder are separate checks. Reopening the event verifies the appointment details; a test notification verifies that your phone can alert you. Complete both before relying on your calendar for the visit.